Sonitus fx:surround
Last updated on 3/29/2016by Willy Jones
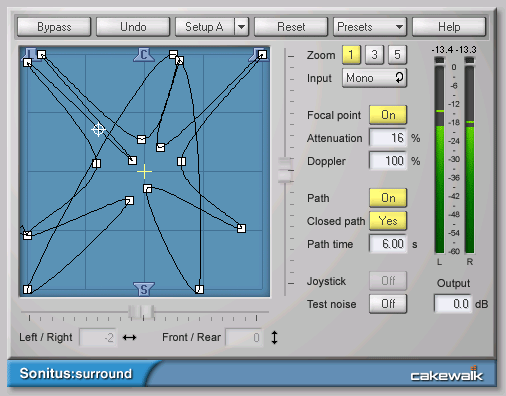
If you're working in surround then the Sonitus Surround effect instantly becomes one of the most helpful tools in your arsenal. fx:surround is a surround sound panner with built-in doppler and attenuation rendering for distance and velocity effects, joystick control and graphical path editing. fx:surround creates a stereo signal containing encoded surround and center channel information. To make full use of the plug-in and hear the effect, a surround-sound capable decoder and speaker set-up is required.
For this tip we are going to explore the path function of the surround plug-in- you don't need to have a surround playback system but you will not be able to hear the full effect with out it. Let's get started by creating a new blank project and importing an audio track into it. The track can be of anything or you can open one of the demo projects included with your version of SONAR. If you are using a multi-track project - be sure you Solo the track you plan on working with. Once we have our track, insert the Sonitus Surround effect into the track's fx bin.

The first thing we want to do is start from a blank slate. Click the Reset button located at the top of the plug-ins interface. Now do the following:
- Locate the Path button and click it so that it reads "On" and illuminates
- then ocate the white cross hair indicator in the blue panning area of the interface and drag it to the center
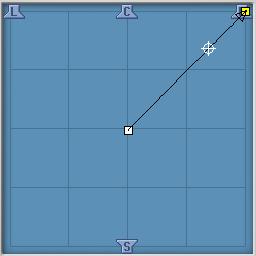
- Next, click and drag a line from the center of the panning area to the upper right corner of the panning area. It should now resembe the image below:

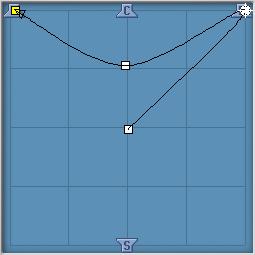
You should now also notice that the white crosshair is now moving across this line. You can adjust the speed at which this happens by changing the value for the Path time setting. This indicates how much time in seconds it takes for the crosshair to move across the line. The crosshair indicates the position the signal is being placed in the surround field. With the setting above, the signal starts dead center and moves to the front right speaker. Next, let's add some more points to this destination so it sounds a little more interesting. Hold down then CTRL key and double-click on the panning area to add a new destination. Let's add one in the center front and then one in the front left speaker so it looks something like the image below:

If you haven't done so already hit play or the SPACEBAR and give it a listen. Notice how the signal is automatically moving from the right to left side? Experiment with the Path time setting until you find something you like. You should notice how the signal is moving from the right to the left and then jumping back and starting over, to make the process smoother click the Closed path button on the Surround interface so that it is illuminated and displaying "Yes". You will notice that the loop is now closed and the white crosshair moves smoothly around the created loop.
Automated panning is one very helpful function of the Surround plug-in. With a little creativity this can be used to make a very interesting mix; try applying it to the audio track of a synth pad. Experiment and have fun!