Using AudioSnap for Drum Replacement
Last updated on 3/28/2016|
By Bill Jackson SONAR 6.2.1 offers advanced tools designed to analyze and modify the rhythmic properties of your audio clips. This is very useful when your original recording is close to what you want, but not quite "there." In some cases, you simply can't get a certain drum to sound the way you want it to. For example: The first step of your recording session was tracking the drums—the whole performance was captured and sounds great, but after tracking bass, guitars and vocals you find that the kick drum simply doesn't fit in the mix. In this Tech Tip we'll walk through replacing a kick drum track with a sample from Session Drummer 2, which is included with SONAR 6 Producer Edition.
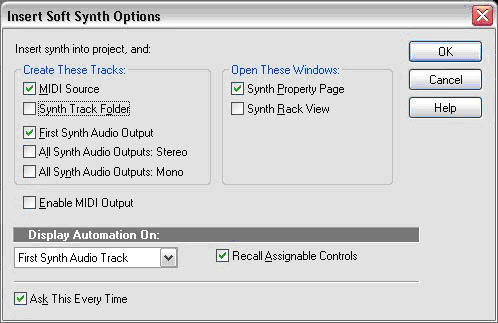
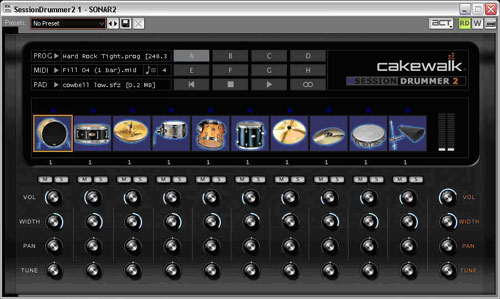
Click the OK button. You now have 2 new tracks at the bottom of the project. The first is a synth track and the other is a MIDI track. You will also see the Session Drummer 2 property page. Click where it says "New Program" to open the Program Browser. Click the plus sign next to "Hard Rock" and select "Hard Rock Tight.prog". This kit contains the kick drum sample we plan to use.
Tip: Click the kick drum icon to hear what that particular sample sounds like. Pick another program if you don't like it.
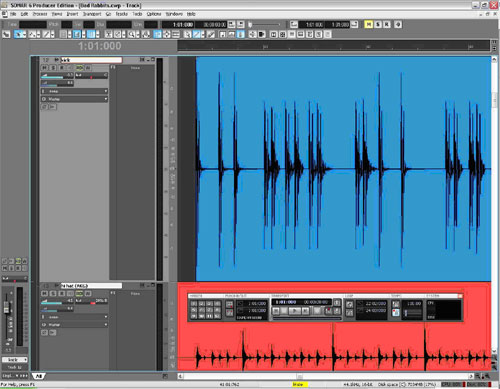
The drums start at about measure 40 in this song, so open the track folder named "Robbie Copeland drums" and scroll to measure 40. You may also want to expand track 12's height, since that's the track we will be working with primarily. Also zoom in horizontally enough to view individual kick drum hits. Tip: An easy way to zoom is by holding down the "Z" key on your computer keyboard and click-dragging over the section in which you want to zoom. Here's what my layout looks like:
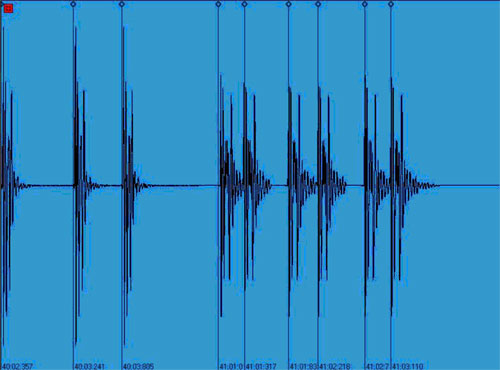
Right-click on the kick drum clip and choose AUDIOSNAP | AUDIOSNAP ENABLE. This will create "Transient Markers." These markers represent each drum hit. With this particular track the default settings work very well. But in some cases other drums have bled into your kick drum track. These may have transient markers also, but the drum that the microphone was on will definitely be louder. On your "AudioSnap Palette" (SHIFT + A) there is a Threshold slider. Move this up until only the drums you want to work with have a Transient Marker assigned to them.
Now click the Add Transients to Pool button. The transients in the Pool are the ones that will be affected by any processes you run.
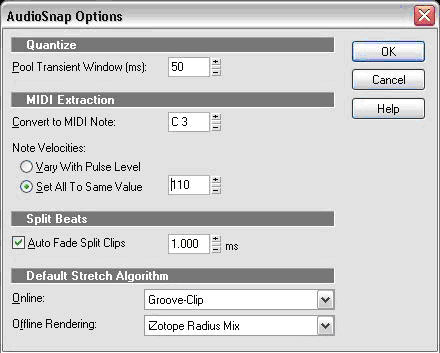
We're going to be creating a MIDI clip based on the Transient Markers that we've added to the pool. In the "MIDI Extraction" section we can specify which note is created. The kick drum in Session Drummer is triggered by MIDI note C3. So type "C 3" in the field marked "Convert to MIDI Note:" The "Note Velocities" option allows you to specify whether or not the MIDI notes are played harder or softer based on the volume of the source transient. In this example we'll choose "Set All to Same Value" and type in 110. Hit OK to apply the settings.
On the AudioSnap Palette selet "Extract Groove" under Task and then click Copy As MIDI Notes under Actions.
This has added C3 notes, based on the kick drum audio track, to the clipboard. Now let's paste it to our Session Drummer 2 MIDI track.
Now go to EDIT | PASTE. Set your "Destination" to Starting Track 46 (our Session Drummer 2 MIDI track) and click OK. That should do it. You will hear both the new drum and the original audio track. This leaves you with a few options. You can choose to layer the two drums together, or solo the new one. Either way, this is a great feature that you can use creatively in your mixes. |
