Make your Session Drummer your Session Guitarist
Last updated on 3/31/2016
The Session Drummer was designed to quickly generate drum parts for practicing, composing, or just playing. But a SONAR owner named Eric S. told us he uses Session Drummer to manage his guitar, piano and bass tracks as well. We knew you'd be interested in his methods, so we present the following tech tip written by the Bloodhound, Eric S.
Have you ever wanted a SONAR plug-in that allows you to store and catalog your favorite MIDI parts? Using Session Drummer allows you to create backup bass tracks, piano tracks or anything you like. In this example I'll use Session Drummer to create acoustic guitar tracks.
Step 1: Create a one or two measure acoustic guitar pattern. You don't have to create it from scratch, if you find a cool pattern in a MIDI file that will work too.

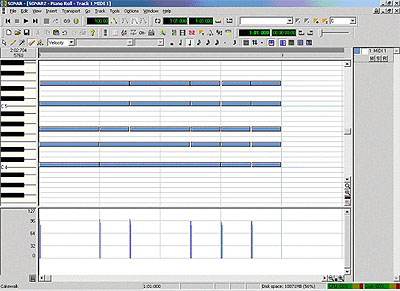
Here, I've created an old style folk guitar pattern.
Follow these tips to make the pattern sound more realistic:
- Make sure that the beginning and ending of the pattern does not cross measure boundaries. Remember that the Session Drummer is loop based and this will make your creations loop smoothly.
- A guitar has 6 strings, but not all are played at the same time. Down strokes (on the quarter beats in above example) will usually play the bass strings first and up strokes (on the 8th beats) play the treble strings first. Play all the strings on any beat you want to accent a bit more.
- When a guitarist strums the strings, not all strings are struck simultaneously. I used the STRUM-IT Cal program (click on te link to download it from the Cakewalk web site) to simulate guitar strums, or just use your mouse to drag the notes a bit.
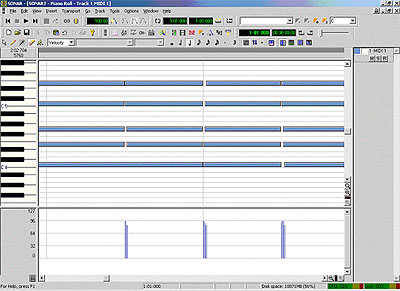
- Not all notes are of equal velocity. I zoomed in a bit on the next picture to illustrate that the first note will be struck with more velocity than the others.

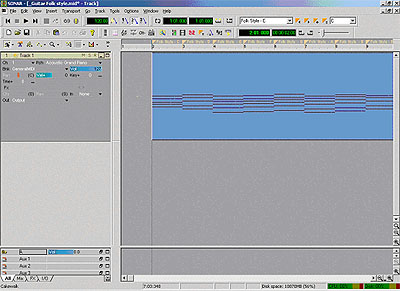
Step 2: Copy this pattern a number of times to measure 2, 3, etc.

In the above example I copied it 7 times. Go to each measure and move the notes around to create more chords. I made my first measure a C chord, the next a D chord, then a E chord, etc. Another easy way is to create a E chord in the first measure and simply transpose each subsequent chord. To transpose select the notes and click Process | Transpose.
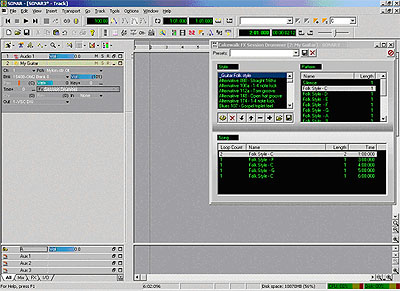
Step 3: Insert a marker at the start of each chord, describing the chord. (This can be done by simply clicking on the orange plus sign in the tool bar). Look at the picture in example 2. I named my chords "Folk style - C", "Folk style D", etc.
Step 4: Save your work as a MIDI Format 0 file. Save the file in the Session Drummer drum styles directory. The default directory is C:\Program Files\Cakewalk\SONAR 2\Drum Styles. I named my file "_Guitar Folk Style". The underscore is only to make sure that Session Drummer sorts it to the top. If you want it at the end, start the name with a "ZZ" or something similar. It will all become clearer in the next step.
Some further tips for creating Session Drummer content can be found in the help file.
Guidelines
- Patterns should be voiced for General MIDI and be contained on a single track
- Patterns can be of any length
- Patterns must include a marker, located at the beginning of the pattern.
- Make sure that the pattern is aligned to a measure. Setting the snap to button to 1 measure is helpful to ensure this.
- Make sure that the beginning and ending of the pattern does not cross measure boundaries. Remember that the Session Drummer will loop and you want it to loop on measure boundaries.
- Make sure that the volume of the pattern is constant, with no sharp volume increase or decreases.
Step 5: Use the pattern in a song. Start a new file or open any file where you want to make use of your new pattern. Insert a blank MIDI track and assign it to a DXi soft synth. You can use the Edirol VSC, or use LiveSynth Pro with a good soundfont.
Right-click in the track's FX field and choose MIDI Effects | SONAR FX | Session Drummer.

You can now insert any of the chords you created and loop them as many times as you like.